How to Eliminate Fish Eyes in Epoxy Floors: Spot Repair Guide
Are you dealing with tiny craters or blisters popping up after application?
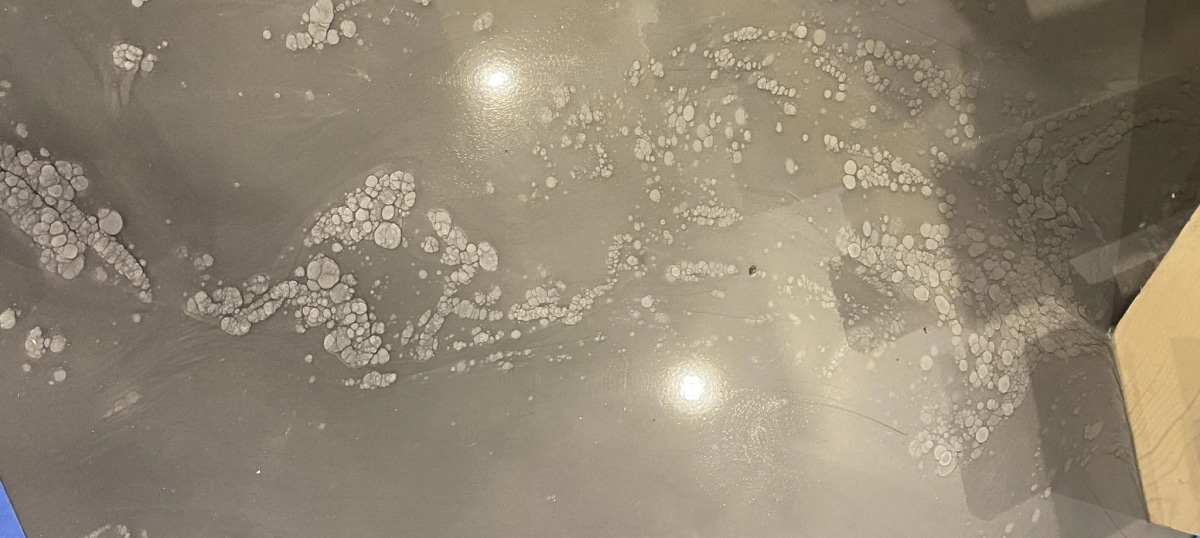
You’re dealing with “fish eyes”—and they’re every contractor’s nightmare on epoxy jobs.
Across Perth, commercial workshops, warehouses, and showrooms are choosing epoxy for its resilience and style. Yet as popularity soars, so do issues caused by poor prep or environmental oversights.
Fish eyes aren’t just an aesthetic failure; they can be signs of contamination, moisture intrusion, or flawed technique.
This article lays out what fish eyes are, why they appear, and most importantly, how to get rid of them—or better yet, stop them before they start. We’ll cover key environmental considerations, step-by-step corrective techniques, and surface prep insights, including the use of diamond grinding.
Whether you’re managing high-traffic flooring in a commercial facility or preparing a showroom finish, this guide will help you troubleshoot fish eyes like a seasoned pro.
Understanding Fish Eyes and Their Impact
Epoxy flooring is widely regarded for its durability, seamless finish, and chemical resistance—qualities that make it a go-to solution in industrial, commercial, and even decorative settings.
When applied correctly, epoxy forms a tough, high-performance surface that stands up to forklifts, foot traffic, spills, and impact. However, one of the most common visual defects that can ruin its uniform appearance is the occurrence of “fish eyes.”
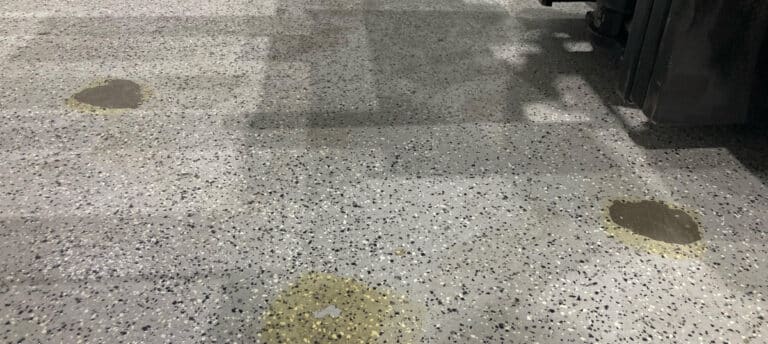
Fish eyes are small, crater-like imperfections that form as the epoxy cures. These surface blemishes disrupt the flow of the resin, preventing it from bonding evenly.
They typically occur when the substrate isn’t properly prepared or when contaminants like oil, dust, silicone, or moisture are present.
Sometimes, environmental factors—like humidity, temperature fluctuations, or airborne particles—also play a role.
Although fish eyes are usually cosmetic, their presence can undermine the protective capabilities of the floor by leaving gaps in the coating.
In areas that demand hygiene, slip resistance, or chemical resilience, such flaws can contribute to long-term maintenance problems or even safety hazards.
For environments like warehouses, food-grade facilities, and mechanical workshops, a clean and even surface is essential, not just for visual appeal, but for performance under pressure.
Environmental Awareness and Compliance
VOC Emissions and Air Quality
Epoxy flooring systems—especially solvent-based formulas—can release volatile organic compounds (VOCs) during installation and curing.
These airborne pollutants can affect indoor air quality, posing respiratory risks to workers and occupants if not managed properly.
In enclosed or poorly ventilated environments, local regulations may require the use of low-VOC or VOC-free products to meet air quality standards.
Surface Preparation Waste and Disposal
Diamond grinding, often used to prepare the substrate, generates dust and debris that must be disposed of responsibly.
Depending on the size and location of the job site, this waste may fall under local council regulations related to construction byproducts.
Improper disposal of contaminated rinse water or epoxy-related residues can breach environmental protection laws.
Permits for Commercial Installations
While residential epoxy installations rarely require permits, large-scale commercial applications, particularly in food processing, mining, or industrial settings, may trigger regulatory oversight.
Permits might be needed if the job involves structural alterations, fire compliance, or chemical storage compatibility.
Epoxy floor coatings used in health-sensitive environments, like commercial kitchens or pharmaceutical plants, must also adhere to Australian safety and hygiene standards, often requiring third-party certification or council approval.
Site Inspections and Industry Compliance
Final inspections may be required by local councils or facility managers before handover, particularly for commercial or government projects. These inspections typically verify slip resistance ratings, non-reactivity, and overall workmanship.
In Perth, floors installed in public access areas must comply with AS 4586 slip resistance requirements. In food or chemical-sensitive environments, floors should meet HACCP or WHS compliance to pass safety inspections and audits.
Tips For Matching System to Site
Assessing the Functional Demands of the Space
Before selecting an epoxy system, it’s essential to evaluate what the floor needs to endure daily.
High-impact zones like workshops, garages, or processing facilities require coatings that withstand abrasion, chemical exposure, and constant foot or vehicular traffic.
In contrast, a showroom or office entryway may prioritise visual appeal over industrial resilience. Understanding how the space functions determines whether standard epoxy, flake systems, or polyurethane cement is most appropriate.
Moisture Levels and Substrate Health
Surface integrity plays a critical role. Moisture trapped in concrete or a compromised substrate can lead to failure, fish eyes being one symptom. A moisture test, such as a calcium chloride or RH probe, is a must before applying any coating.
Tools like digital moisture meters and core sampling drills help contractors detect underlying problems that aren’t visible on the surface.
Environmental Conditions During Application
Temperature, humidity, and ventilation can affect how well the epoxy bonds and cures. Perth’s climate can vary dramatically, especially in regional WA, so monitoring conditions with a digital hygrometer and infrared thermometer is key.
For enclosed environments, mechanical ventilation might be necessary to control vapour concentration and promote a uniform cure.
Lighting and Dust Control
Proper lighting allows for visual inspection during and after application, helping identify imperfections like fish eyes early. Dust, another frequent culprit, should be mitigated with air scrubbers, anti-static cloths, and sealed mixing zones.
Equipment like HEPA-filtered vacuums and tack cloths is a vital tool in ensuring a contaminant-free surface.
Selecting the Right Tools and Materials
Quality application tools reduce the risk of introducing air bubbles or contaminants. Rollers, squeegees, and spiked shoes should be clean, shed-resistant, and purpose-made for epoxy.
Mixing drills must provide a consistent blend speed without cavitating the resin. Using poor-quality tools is one of the fastest ways to compromise an otherwise well-planned floor system.
Reference Guides and Standards
Having access to technical data sheets, MSDS documents, and manufacturer application guides is crucial for every installation. Industry standards like AS/NZS 2311 for painting and surface preparation offer additional layers of best practice.
For commercial spaces, referring to AS 4586 for slip resistance or HACCP guidelines for hygienic surfaces ensures compliance from the outset.
Components, Brands, and Sourcing for Fish Eye-Free Epoxy
Surface Preparation Materials
Proper surface prep remains the foundation for a flawless finish. Start with mechanical abrasion—diamond grinding is the industry gold standard.
It opens the pores of the substrate and removes oils, laitance, or existing coatings that might interfere with bonding.
Recommended Tools
- Diamond Grinders: Husqvarna PG series or Floorex Galaxy grinders
- Dust Extraction: HEPA-filtered vacuums from Pullman Ermator or Festool
Cleaning and Contamination Control
After grinding, floors must be vacuumed thoroughly, then wiped with a solvent such as xylene, acetone, or methylated spirits. This ensures the removal of micro-dust and oils.
Recommended Products
- Solvent Wipes: Diggers acetone or Bondall methylated spirits
- Tack Cloths: Selleys lint-free tack rags for dust-sensitive zones
Primers and Sealers
High-adhesion primers improve epoxy bonding and reduce outgassing or moisture-related fish eyes. Look for penetrating primers that cure quickly and tolerate slight dampness.
Recommended Brands
- Fosroc Nitoprime 120: Ideal for commercial epoxy primers
- Sika® Primer MB: Great for moisture-prone substrates
- Rhino ArmaFloor 500AU Primer: Suitable for both flake and solid colour systems
Epoxy Resin System
The resin and hardener form the core of the system. Consistency in mixing and application ensures a smooth finish, but the product itself must be matched to the environment.
Preferred Brands
- Wagon Paints Duracote 3010: Tough, decorative and suited to Perth climates
- Parchem MasterTop 1080: Reliable for industrial-grade finishes
- PM Designer Flake System (featured range): Offers seamless results with high resistance and decorative versatility
Decorative Additives (Optional)
Flake blends can mask minor surface inconsistencies and create slip-resistant finishes. Choose flake size and colour based on traffic level and design requirements.
At PM Industries, we offer a wide designer flakes range, including popular blends like Ash Grey, Driftwood, and Grey Mist, available across Perth with fast turnaround times.
Slip Resistance and Topcoats
For high-traffic or safety-sensitive areas, topcoats must offer UV stability, anti-slip texture, and chemical resistance. Polyurethane or polyaspartic topcoats provide fast-curing, wear-resistant protection.
Recommended Coatings
- Rhino ArmaFloor 500 UHS: High gloss, rapid curing, UV stable
- Sika® PurCem® Gloss Topcoat: Ideal for food prep and hygiene zones
- Fosroc Nitoflor FC150: Robust choice for commercial zones
Step-by-Step Guide to Avoiding Fish Eyes in Epoxy Floors
Step 1: Inspect and Test the Substrate
Before any machinery comes out, inspect the concrete for cracks, spalling, or moisture issues. Conduct a moisture test using a calcium chloride kit or an in-slab RH sensor.When to Call a Pro
If moisture readings are above recommended thresholds or structural cracking is visible, consult a flooring specialist. Improper assessment can result in total coating failure.Step 2: Perform Diamond Grinding
Use a diamond grinder to mechanically open the surface and remove all contaminants. This ensures a textured surface for epoxy to bond to.Best Practice
Grind in multiple directions to expose pores evenly. Attach a dust extractor with a HEPA filter to reduce airborne particulates and maintain job site safety.Step 3: Clean the Surface Thoroughly
Vacuum up all dust and particles immediately after grinding. Follow this with a solvent wipe using acetone or methylated spirits to eliminate invisible oils and residues.Tip
Use lint-free cloths and work in small sections. Avoid letting solvent pool or evaporate unevenly, as residue can itself cause fish eyes.Step 4: Prime the Floor
Apply a compatible primer using a roller or squeegee. Work quickly but evenly, and allow full curing before proceeding to the next layer.Best Practice
Maintain consistent application thickness. Uneven priming can lead to poor adhesion or trapped air bubbles.Step 5: Mix and Apply Epoxy Carefully
Combine resin and hardener precisely as per the manufacturer’s ratios. Mix using a low-speed mechanical drill with a spiral mixer for a minimum of 2–3 minutes.Best Practice
Pour mixed epoxy into a new container (“box mixing”) before application to prevent unmixed components from causing imperfections.Warning Signs
If mixing results in clumps, discolouration, or rapid thickening, discard and restart. These are signs of contaminated or improperly measured components.Step 6: Apply Epoxy Evenly
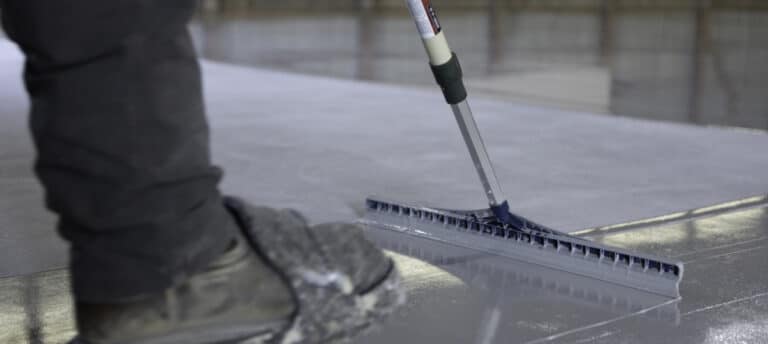
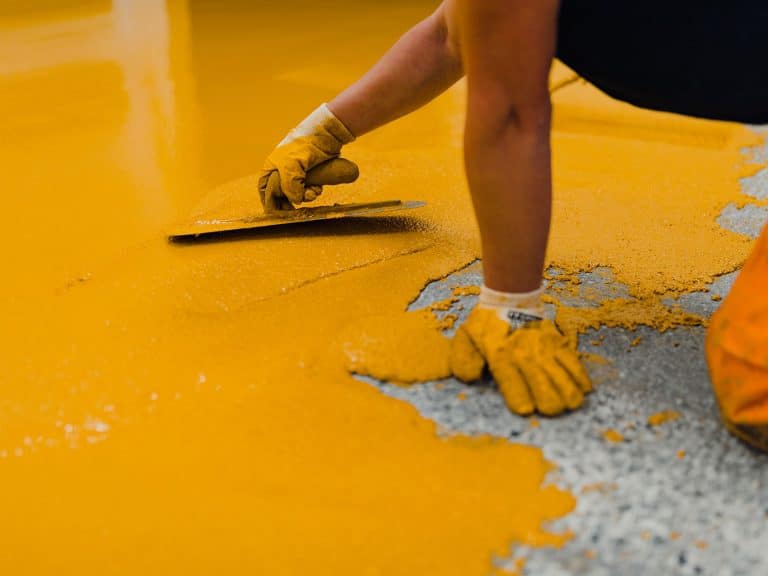
Using a roller, squeegee, or notched trowel, apply the epoxy steadily across the surface. Use spiked shoes to walk over the wet floor for application continuity.Tip
Roll in crosshatch patterns for uniform spread. Avoid overworking the material, which can introduce bubbles or uneven gloss levels.Step 7: Optional – Broadcast Flake or Add Anti-Slip Texture
If required, broadcast decorative flake or anti-slip media while epoxy is still tacky. Apply evenly across the surface and allow full cure before scraping or sealing.Step 8: Apply Topcoat
Once basecoat and decorative media have set, seal the surface with a polyurethane or polyaspartic topcoat. This adds UV resistance and final durability.Best Practice
Use a clean roller and maintain a wet edge throughout the application. Do not rush this stage—curing time and even coverage are critical.Step 9: Curing and Inspection
Allow the floor to cure as specified—typically 24 to 72 hours, depending on product and temperature. Avoid traffic or cleaning during this period.Final Tip
Inspect under natural and artificial light. If fish eyes, bubbles, or patchiness appear, document the issue and assess whether rework or repair is required.When to Bring in a Professional
If you’re unsure about your preparation, spot contamination after priming, or see defects forming during application, pause. A professional installer with WA-specific experience can correct issues before they become costly.How Much Will It Cost to Remove Epoxy Fish Eyes?
| Component | Approximate Cost | Notes |
| Diamond Grinding Equipment Hire | $300–$600 per day | Includes grinder and HEPA vacuum |
| Cleaning Solvents & Materials | $50–$150 | Includes acetone, lint-free cloths, tack rags |
| Primer (20L) | $250–$400 | Brands: Sika®, Fosroc, Parchem |
| Epoxy Resin System (20L) | $300–$700 | Coverage approx. 30–40m², depending on thickness |
| Flake (optional, 5kg bag) | $50–$100 | PM Industries blends in stock across WA |
| Polyurethane/Polyaspartic Topcoat | $350–$600 (20L) | Required for UV stability and slip resistance |
| Tools (rollers, mixers, PPE) | $100–$200 | Single-use or low-cost repeat use |
| Labour (Professional Installer) | $40–$70 per m² | Includes all preparation, coating, and clean-up |
Note: Prices are indicative and vary based on scale, supplier, and region.
Recap: Your Guide to Flawless Epoxy Finishes
Avoiding defects like fish eyes helps support appearance, longevity, safety, and professional reputation.
Here’s a recap of what matters:
- Fish eyes form due to surface contamination, moisture, or environmental disruption during application.
- Diamond grinding is a non-negotiable step in preparing the concrete substrate for adhesion.
- Humidity, temperature, and ventilation must be monitored to reduce risk of surface failure.
- Using quality brands—like Sika®, Fosroc, and PM Industries Designer Flake—makes a major difference in results.
- Even the best products fail without correct technique. Clean tools, accurate mixing, and even application are key.
- Financial planning should include material, labour, and compliance costs—WA-specific grants may offset some investment.
- Knowing when to call in an experienced professional can prevent expensive rework or future safety risks.
Ready for Results? Let PM Industries Help You Get There
Tired of unpredictable finishes or costly do-overs? Whether you’re managing a commercial workshop, upgrading a showroom, or installing food-grade flooring, precision matters.
At PM Industries, we don’t just coat floors—we engineer high-performance surfaces built to last.
For tailored guidance, product recommendations, or a free quote within 48 hours, reach out to our Perth-based team. We’ll assess your space, match the right system to your needs, and ensure your epoxy flooring performs as well as it looks.
Speak to a member of our team on (07) 5437 6405 or contact PM Industries online for a free consultation and quote.

